Warming up with Octave Overtones

We all know (or have been told) that it is vital to our musical skill to have a consistent warm-up routine. However, for a variety of reasons we skip those warm-up routines and jump right in to our literature. In addition, when we hear the words “long tones” most of us completely shut down! So, here is my first VLOG warm-up routine that utilizes octave overtones as a long tone exercises. I like to be as efficient with my routine as I can and, therefore, utilize my long tone practice as a vehicle for my overtone/voicing practice.

Mouthpiece Pitch - why is it important?

Voicing

Before we jump into playing on the mouthpiece, we need to have an understanding of voicing and its place within playing the saxophone. Growing up, I was always told to “drop my jaw” if I was sharp and “bite” if I was flat. When I tried to play anything below a low D and produces pitches in the overtone series, I was told to “drop my jaw” so that the lower notes would respond. Although dropping your jaw and biting on the reed may have the desired effect, those actions come with a whole host of other issues (i.e. fuzzy sound, thin sound, squeaking, etc.). What I was told is still being shared with young students today and, in my opinion, we are teaching “quick fixes” in our music education methods classes rather than sustainable solutions that won’t transfer into other problems in the future.

Later in my studies I learned that we need to keep a constant pressure around the mouthpiece. The embouchure is meant to keep the mouthpiece stable in our mouth and support the mouthpiece and the reed. It is our tongue position and the manipulation of that motion that helps us voice the low register (“u” position or like you’re yawning); adjust for crazy intonation (fourth line D which is crazy sharp - bring tongue to “a” or “u”); and help us have success in the altissimo register (“e” and “i”).

download-1.jpg

Voicing refers to tongue position. If you think of making various vowel sounds “aa,” “ee,” “ii,” “oo,” “uu,” etc. you should be able to feel your tongue in various positions. These positions or “voicings” are what allow saxophonists to produce low Bb, not sound shrill on palm key F, and fix issues at all points in between those two pitches.

The saxophone is a perfectly imperfect instrument that is very easy to produce a sound, but very hard to make a sound that someone wants to listen to. But, by addressing the voicing and understanding why that is important your playing or your students’ playing will drastically change for the better.


Mouthpiece Pitch

When warming up and starting my day of playing, I begin on the mouthpiece. Three to five minutes on the mouthpiece helps me warm up my aural cavity and gain flexibility that was lost from not playing overnight. Think of it like this: Your tongue is a giant muscle much like your hamstrings. If you were to bend over and try to touch your toes, could you do it? Maybe, if you have limber hamstrings. But, if you haven’t practiced stretching, then probably not. Your tongue works in the same capacity. A large range of flexibility can be worked on, however, if we don’t maintain that flexibility we will lose it.

Fun Fact: Your tongue takes more space on your brain than any other body part or organ. Which means it takes more brain power to control your tongue than anything else!

images.png

What to do when warming up?

Each mouthpiece has a specific pitch that is the “goal.” What that means is we are utilizing these pitches as our “home base” tongue position so that we can work our range from here. (note: these are concert pitches)

On an alto mouthpiece the goal is to be set at a concert A. If you’ve never done mouthpiece exercises you will more than likely be higher than the A so start wherever you feel comfortable. After finding your starting pitch you want to work the pitch down. I use “ee” to “ahh” with students and equate the movement of the tongue to the movement of a trombone sliding down. It is important to keep supporting and pushing lots of air in addition to not changing the embouchure. Remember, the goal is constant pressure around the mouthpiece. As you work the pitch down you will reach your limit as to how low you can go (just like if you were trying to bend over and touch your toes), but with repeated practice that limit will change.

Notice I haven’t suggested playing above the starting pitch. Let’s be honest - no saxophonist needs help playing sharp. It is the range of flexibility moving down that will give us a resonant tone and allow us to adjust for pitch. Below are some things that I work on.

  • Produce starting pitch and hold it steady

  • Work the pitch down in half steps

  • Try scale patterns or songs

  • Practice controlling extreme dynamics while maintaining the pitch

Remember, if you can control the mouthpiece the rest of the horn is just an amplification of that!

Go forth and make great sounds! If you have any questions feel free to write me and thanks for reading/watching!

What is the deal with balloons?

It’s here! The inaugural blog post!!

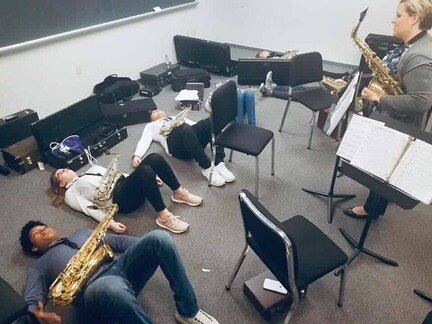
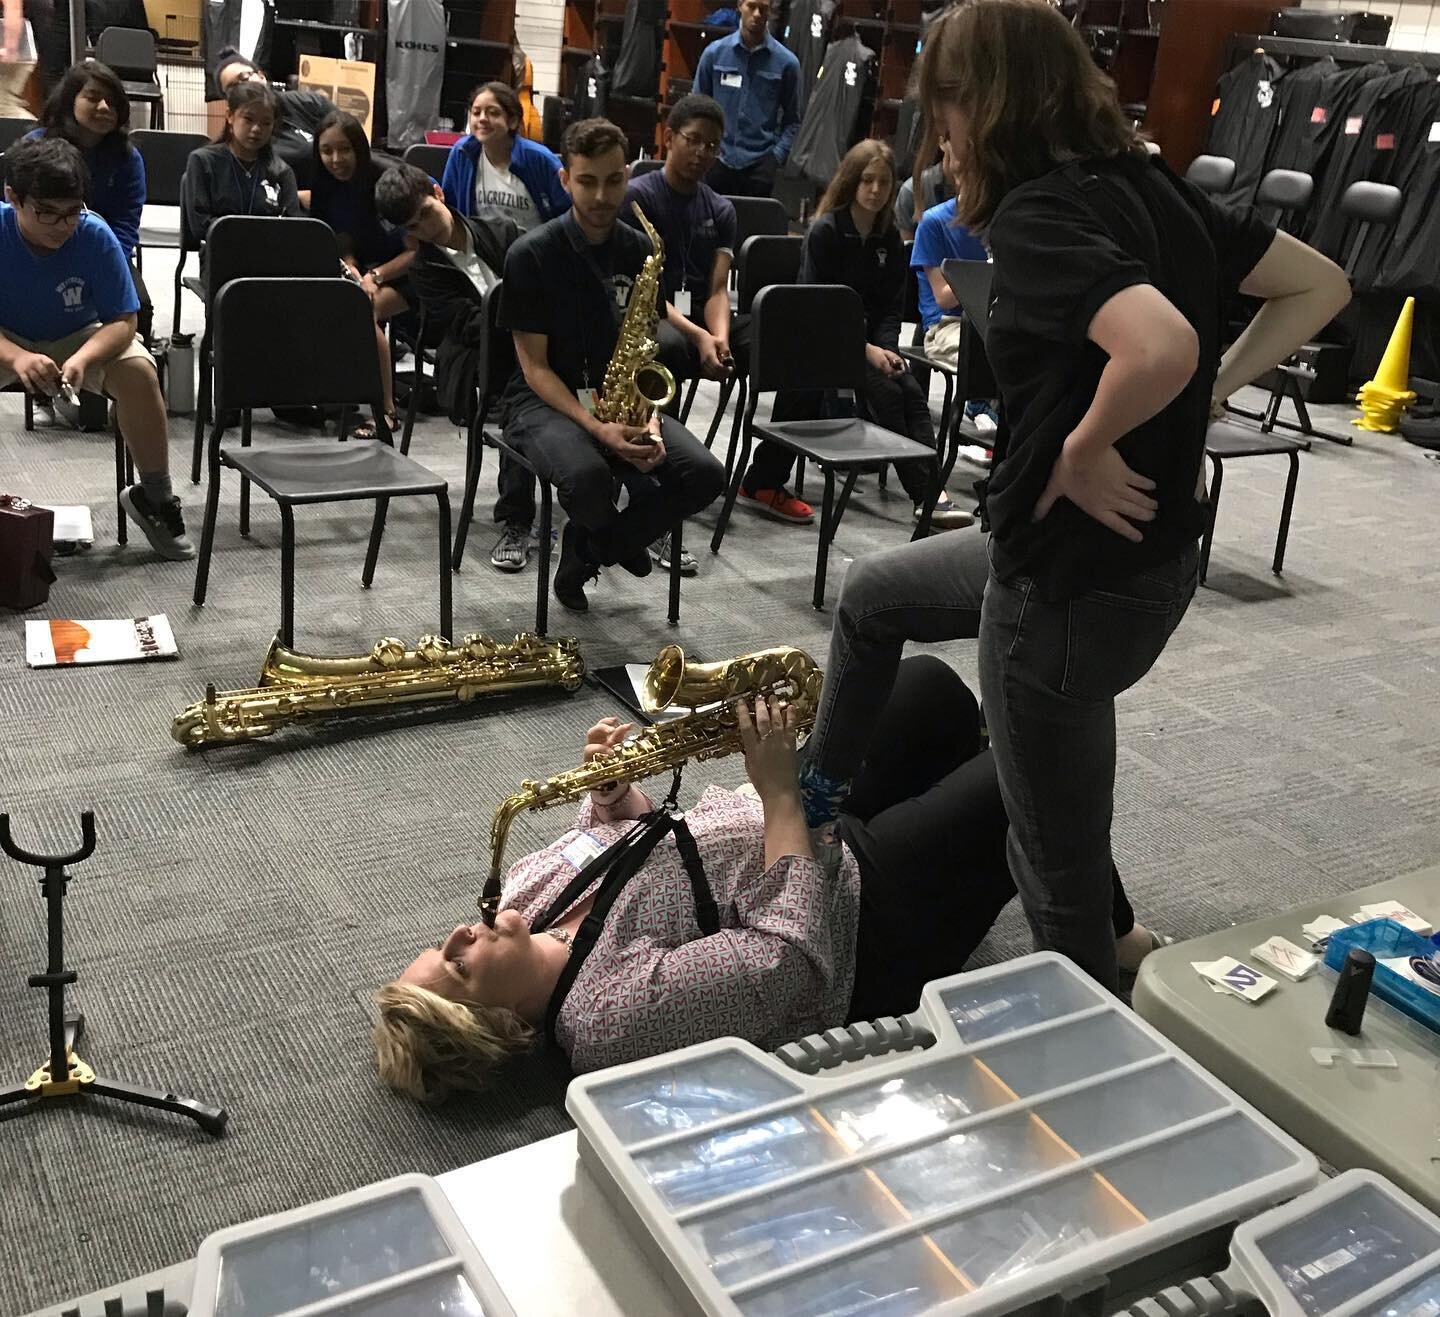
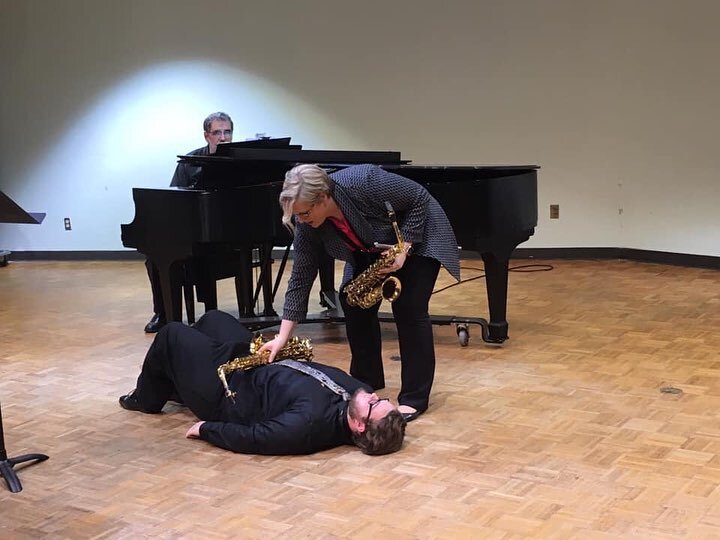
For my first venture into this new arena I thought I would tackle a question that has been posted to many pictures from various Vandoren clinics.

Quick note: I am a Vandoren Artist-Clinician (SHOUTOUT TO VANDOREN!) and if you don’t know what that means…

The goal for the Vandoren Artist-Clinician program is to enhance the quality of the music experience through education and the assistance of Vandoren. These highly trained professional educators and performers will engage your students through educational and fun sessions. The clinics they conduct cover a broad spectrum of topics and, based on your input, can be customized to fit the needs of your students. Contact us today to arrange your free Vandoren clinic.

So if you are interested in having me out to do a free clinic at your school please visit my the clinics page on my website.

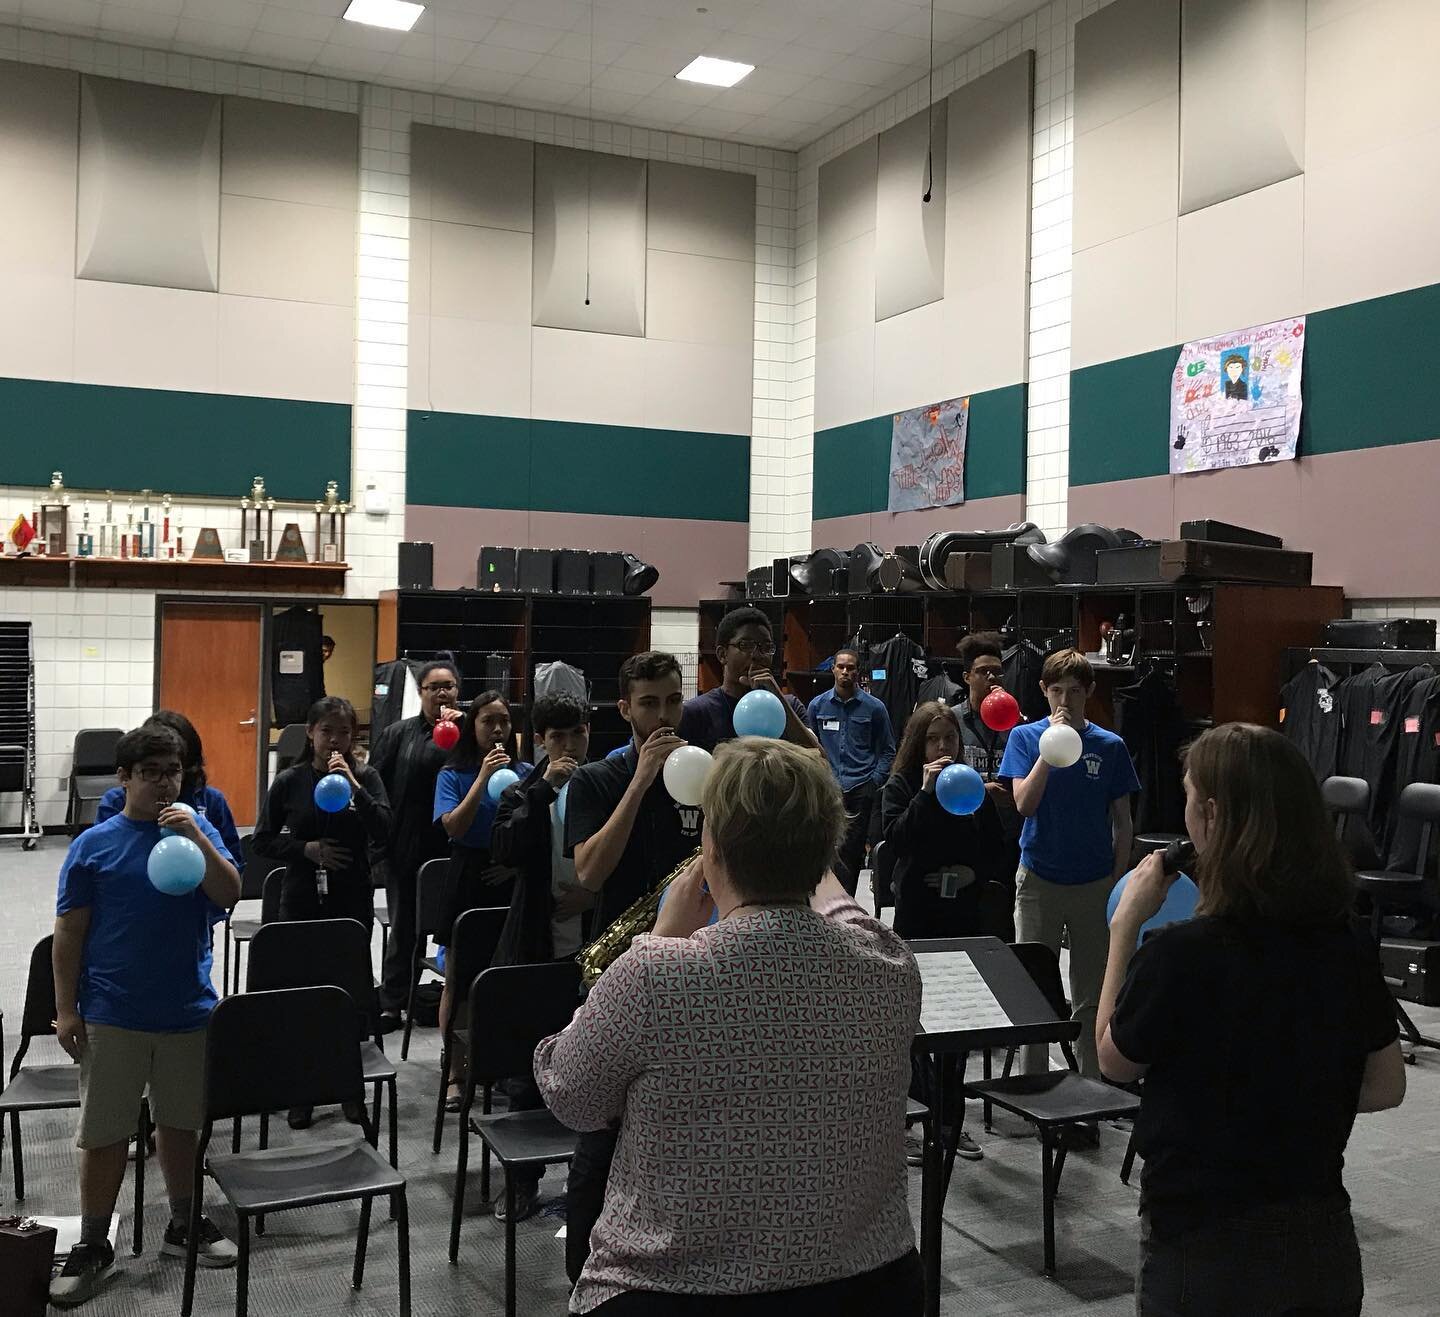
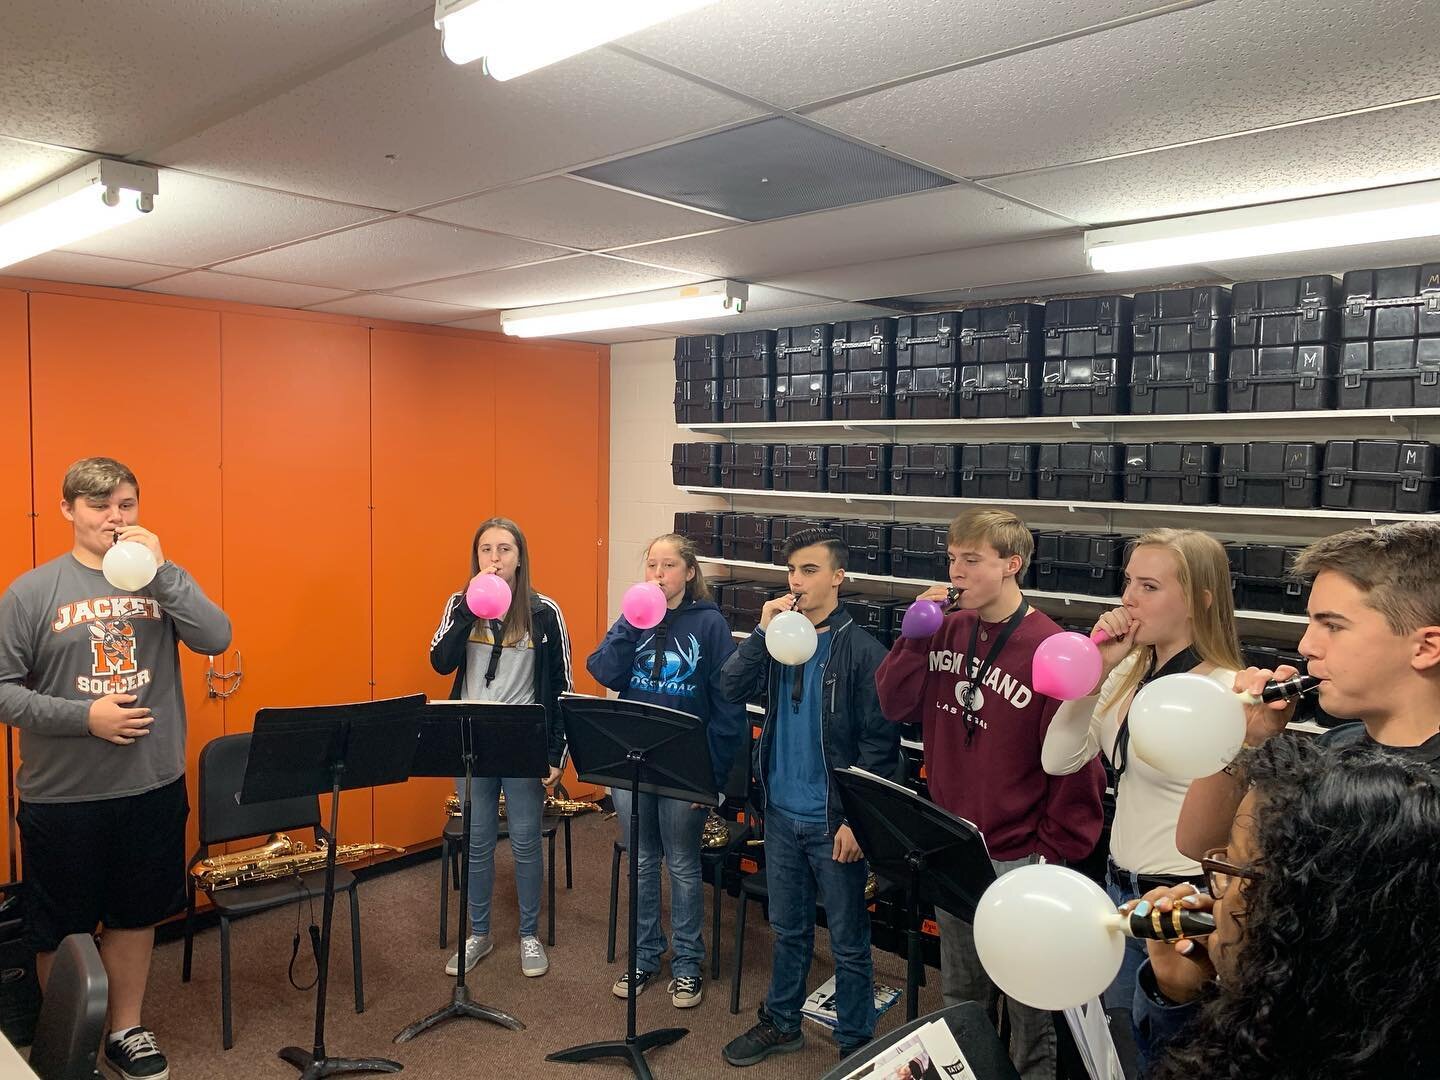
Every spring the Vandoren Artist-Clinicians gather for a summit to reflect on the year and share ideas. In addition, Vandoren shares product information and gives us great tools that we can go out into the world and mix with our own pedagogy to enhance our workshops. The Balloon Trick came from the 2016 Vandoren Artist-Clinician Summit in Los Angeles, CA and I have been utilizing it ever since!

General Thoughts on Air

AIR FIXES EVERYTHING!

Without good air and good support every aspect of our playing suffers. In my opinion, saxophonists have LAZY air! Throughout my studies as a saxophonist, not much time was spent on air. In fact, I feel like I never really knew how to control my air until I began seriously studying flute. Since discovering my air was a problem, I have made it my mission to make sure students understand how to breathe and support and utilize their core when they are playing. Unfortunately, most of our instruction happens while sitting down, so getting students to utilize their core while seated is definitely a trick!

When I explain air, I describe it as two processes. The inhalation and the exhalation. Most students are fairly good at the inhalation, however, for some reason when students get a bright, shiny object in their hands they automatically decide it’s time to raise their shoulders when they inhale. Therefore, it is always good to remind them of what relaxed breathing feels like. The exhalation process is the one that I feel students lack because so much of our talks on breathing focuses on taking a good inhale, but not supporting through the exhale.

One way I get students to realize what relaxed breathing is like and how much core support they need (inhale and exhale) while playing is by having them lay down on the floor. Here’s the process:

  • Have students lay flat on their back with their feet flat on the floor and their knees up. (note: this will ensure that their entire back is supported by the floor)

  • Next I’ll have students rest something on their stomach. It could be their saxophone, a small case, a stuffed animal (I have Pongo the air penguin in my office).

  • As students inhale I have them notice the height to which what is resting on their stomach reaches. In addition, I also have them notice how their lower back pushes into the floor.

  • After several times inhaling and working on filling up the “inner tube” around our waist, I will have the students add their exhalation. This time however high the product on their waist got on the inhale they will try to hold it at that level as they exhale.

Once students go through this process they also realize how much air it takes to actually support their sound and they realize they haven’t been engaging their core.

Note: after describing inhale and exhale I do discuss how air is a constantly moving thing (either in or out) and at no point should your air stop flowing in either direction.

Other ways I have utilized for students to realize how much core support they should be using are:

  • Boat pose (yoga trick)

  • Sitting in a chair and holding their feet up (not touching the ground)

  • Wall-sits or just plain squatting

  • Sitting on an exercise ball

  • Standing up on one foot. When students have to balance on one foot their core is automatically engaged.

Students are only allowed to sit back down once the students feel how much core support it actually takes to play.

The Balloon Trick

Full disclaimer: I DID NOT come up with this idea!

The balloon trick, I believe, was started by a clarinet teacher on the West Coast (and if someone knows, please feel free to comment). Much like the ideas above, the goal is to get the students to understand just how much core support is needed when they play.

Here’s what to do:

  • Always ask if anyone has an allergy to latex before passing out balloons!

  • Have the saxophonists affix the balloon to the end of their mouthpiece

  • Have the Bb clarinetists affix the balloon to the end of their barrel and the Bass Clarinetists affix the balloon to the end of their mouthpiece

NOTE: This works best if you have one person hold the mouthpiece, and one person put the balloon on the end. Saves in balloon rips and mouthpiece drops!

  • Next have the students

    • Set their embouchure

    • Breathe through the corners of their mouth (not through mouthpiece because they can’t and because we don’t want them breathing through their instruments)

    • Close corners

    • Fill up the balloon (they can make sound or not, either is fine)

This trick is VERY telling of the students who are supporting and who definitely are not. Those who aren’t supporting their sound will see their balloon barely fill up and others completely fill up. It’s a great comparison for the entire class.

The other wonderful benefit is it is a visual representation of “playing through the phrase.” Later as we are playing through music or scales or anything with a musical phrase I can then reference continuously filling and expanding the balloon - it should constantly be filling.

So there you have it, the balloon trick! I hope you found this helpful and if you have any questions please feel free to reach out!


75402143_10109194395325100_7864010188976553984_o.jpg

Welcome to my blog!

This blog has been sitting on my website dormant for far too long! Welcome to my blog filled with a whole lot of music and much more! Do you have a topic/question? Feel free to add to the comments for a future blog post!

Thanks for reading and I look forward to creating a fun blog to follow!

Sarah